

How Long Is 5x Animation Title In Openshot
Animation
OpenShot has been designed specifically with animation in mind. The powerful curve-based animation framework can handle most jobs with ease, and is flexible enough to create simply about any animation. Central frames specify values at certain points on a clip, and OpenShot does the difficult piece of work of interpolating the in-between values.
Overview
| # | Name | Description |
|---|---|---|
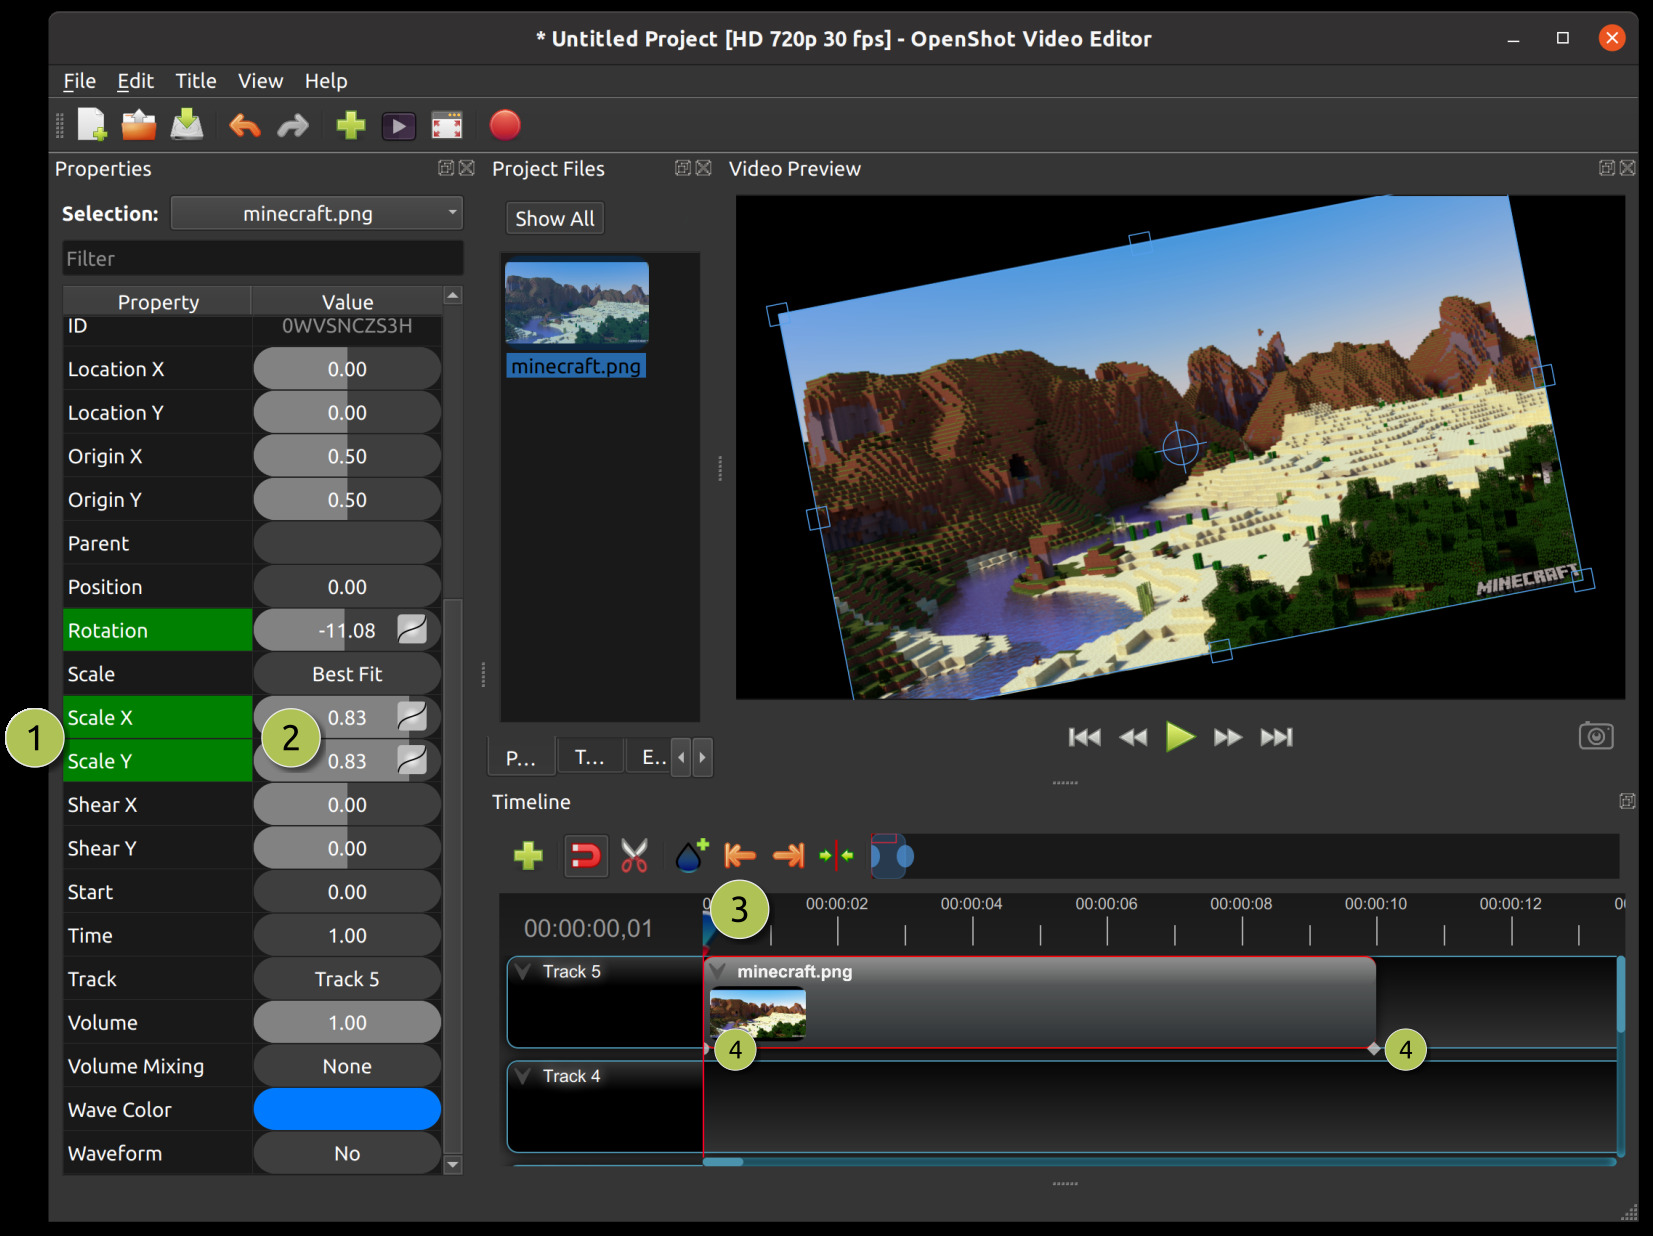
| 1 | Green Belongings | When the play-head is on a fundamental frame, the property appears green |
| 1 | Blueish Holding | When the play-head is on an interpolated value, the property appears blue |
| 2 | Value Slider | Click and drag your mouse to adapt the value (this automatically creates a key frame if needed) |
| 3 | Play-head | Position the play-head over a clip where you lot need a key frame |
| four | Central frame Markers | Small dark-green tick marks are drawn at all primal frame positions (on a clip) |
Key Frames
To create a key frame in OpenShot, simply position the play-head (i.e. playback position) at whatever point over a clip, and edit properties in the holding dialog. If the property supports fundamental frames, information technology will turn green, and a small greenish tick marking will appear on your prune at that position. Move your play-caput to some other point over that clip, and accommodate the backdrop again. All animations require at least 2 key frames, just can support an unlimited number of them.
To adjust the interpolation mode, right click on the small-scale graph icon next to a property value.
| Proper noun | Description |
|---|---|
| Bézier | Interpolated values employ a quadratic curve, and ease-in and ease-out |
| Linear | Interpolated values are calculated linear (each step value is equal) |
| Constant | Interpolated values stay the same until the side by side cardinal frame, and leap to the new value |
For more info on prune backdrop, see Properties. For more info on preset animations, see Preset Menu. For more info on creating fundamental frames for location and scale, encounter Transform.
Bézier Presets
When using a Bézier curve for blitheness, OpenShot includes more than xx curve presets (which affect the shape of the curve). For instance, Ease-In has a more than gradual slope at the beginning, making an animation move slower at the beginning, and faster at the end. Ease-In/Out (Dorsum) has a gradual beginning and ending, just really goes past the expected value and then back (producing a bounciness upshot).
To choose a curve preset, correct click on the pocket-size graph icon next to a key frame.

Image Sequences
If you take a sequence of similarly named images (such equally, cat001.png, cat002.png, cat003.png, etc…), you can just elevate and drop one of them into OpenShot, and you lot volition exist prompted to import the entire sequence.
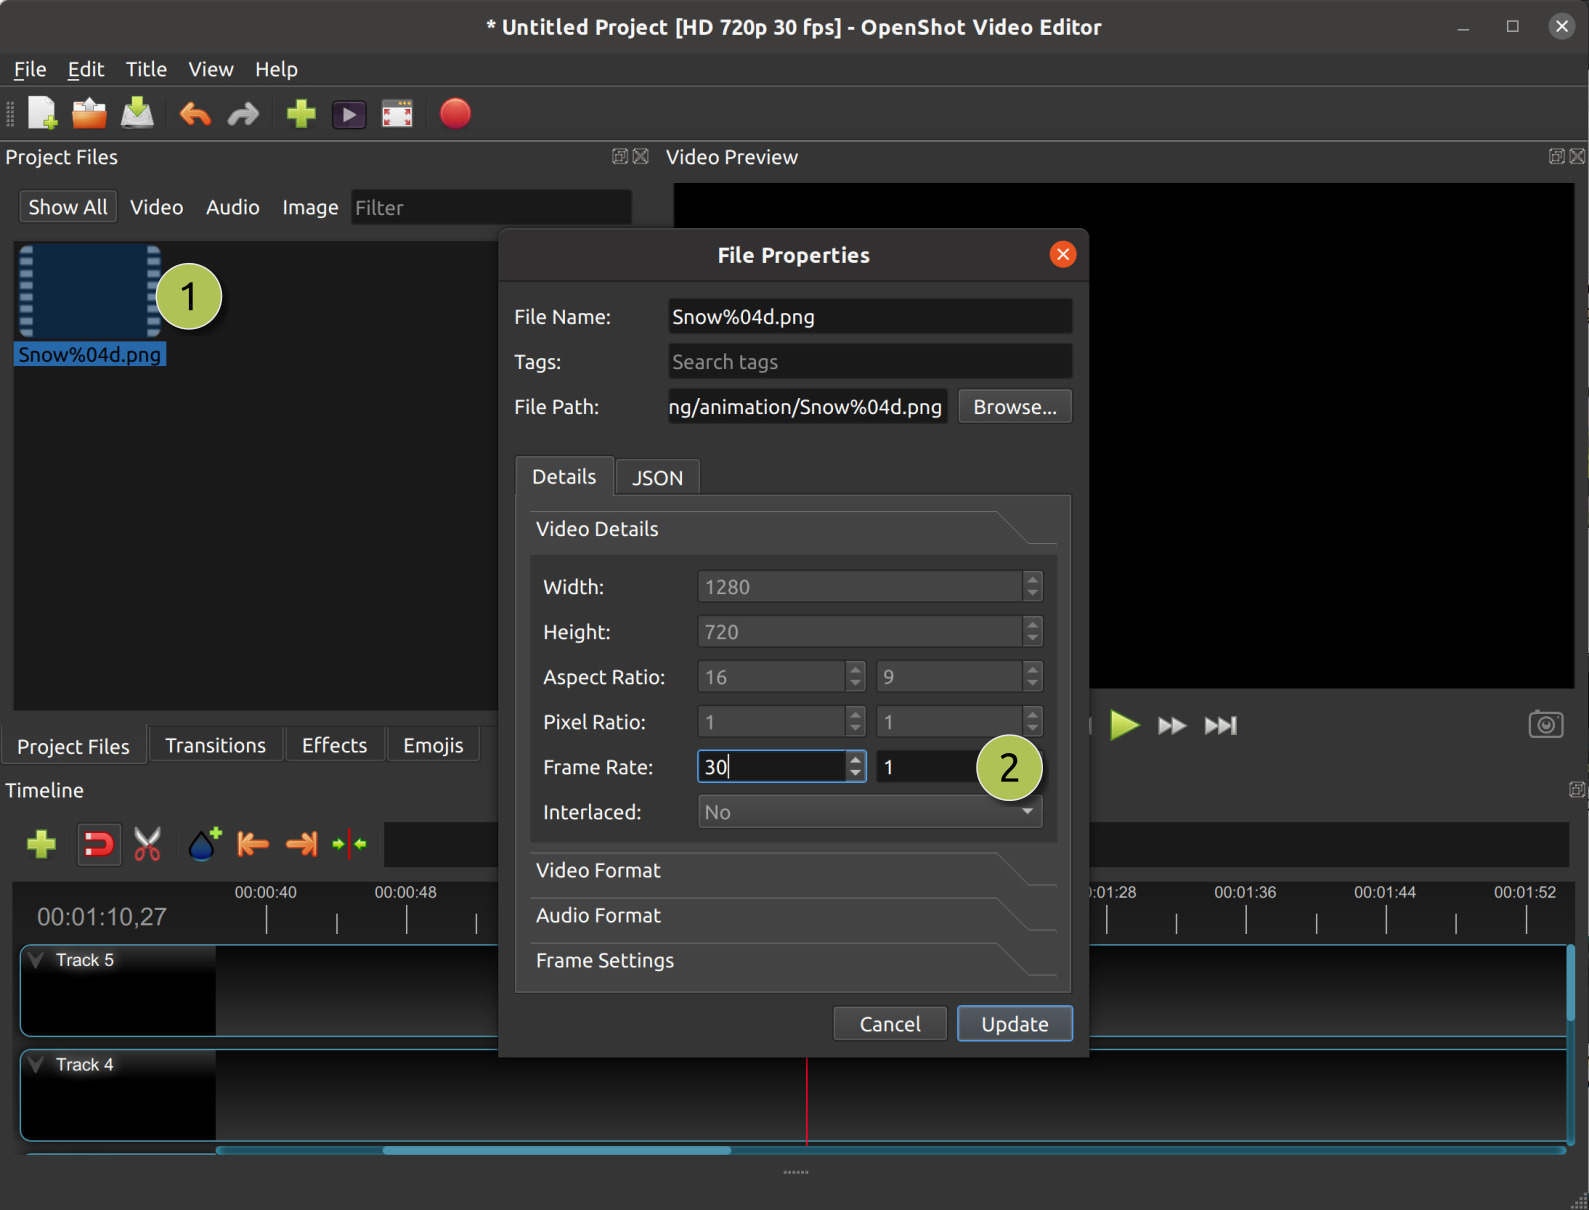
To arrange the frame rate of the animation, right click and choose File Properties in the Project Files panel, and adjust the frame charge per unit. Once you have set the correct frame charge per unit, drag the blitheness onto the timeline.
| # | Proper name | Description |
|---|---|---|
| one | File Properties | Select an prototype sequence in the Projection Files panel, right click and cull File Properties |
| 2 | Frame Rate | Accommodate the frame charge per unit of the animation. Typically, hand-drawn animations use 12 frames per second. |
Source: https://www.openshot.org/static/files/user-guide/animation.html
Posted by: garlandfrome1953.blogspot.com
0 Response to "How Long Is 5x Animation Title In Openshot"
Post a Comment