

How to store unlimited files using Personal Vault (free) in OneDrive
OneDrive Personal Vault is a feature that creates a protected area to store files, such as documents, personal records, pictures, etc.) with sensitive data. The data upload to this area is protected with encryption and using more robust security with two-gene hallmark, in addition to the typical sign-in process.
Although this is a useful feature, at that place's one caveat. If you lot are using the free version of OneDrive, you lot tin simply store up to three files. Yet, if you don't mind some extra steps, you get around this limitation using a nothing container that allows you lot to upload unlimited files (but limited to your OneDrive storage infinite) to the protected area using the free version of OneDrive.
In this Windows x guide, we volition walk yous through the steps to upload unlimited files to the gratuitous version of Personal Vault in OneDrive.
If you don't want to become through the workaround to utilise the Personal Vault, you should consider getting a Microsoft 365 subscription to elevator the file restriction.
Get subscribed
![]()
Microsoft 365
Microsoft 365 gives you full access to all the apps and perks, such every bit 1TB of OneDrive storage without Personal Vault restrictions and Skype minutes. You can also install Word, Excel, PowerPoint, Outlook, and other apps on up to 5 devices, and depending on the subscription, you tin can share the business relationship with upwardly to five people.
How to store unlimited files using the gratuitous tier of Personal Vault
The workaround to upload more than three files to the Personal Vault with the gratuitous version of OneDrive is to grouping all files with sensitive information within of a .zip extension file, allowing the service to see the file every bit a single item.
Configure Personal Vault on Windows ten
If you have already configured the Personal Vault feature, you tin can skip these steps and continue with the upload instructions below.
To configure the Personal Vault feature in OneDrive, utilize these steps:
- Click the OneDrive icon from the Taskbar's notification area.
- Click the Help & Settings push button.
-
Select the Unlock Personal Vault pick.
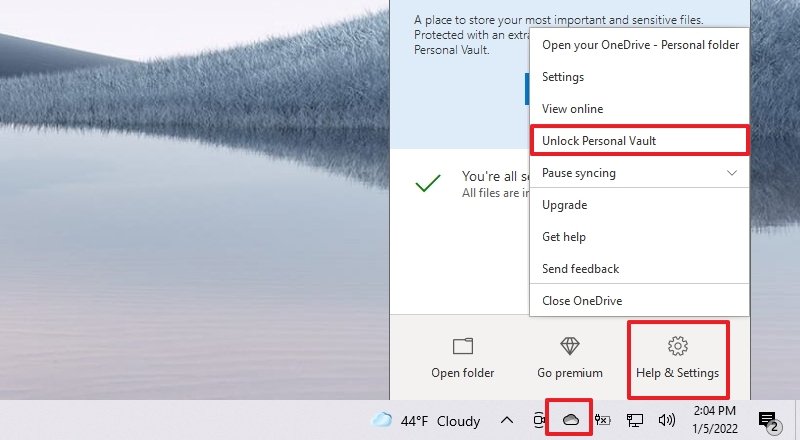 Source: Windows Central
 Quick note: You may also meet a Get started option when launching the OneDrive app, which tin help you configure the feature.
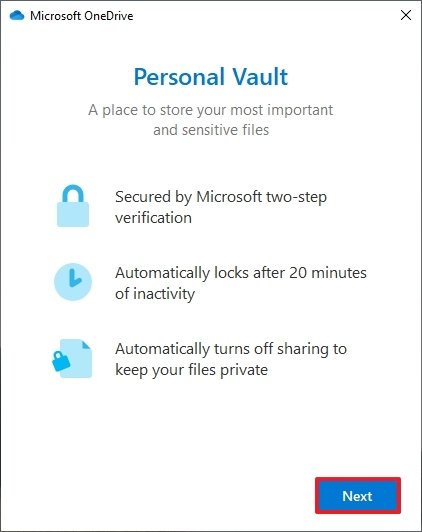
-
Click the Next button.
 Source: Windows Central
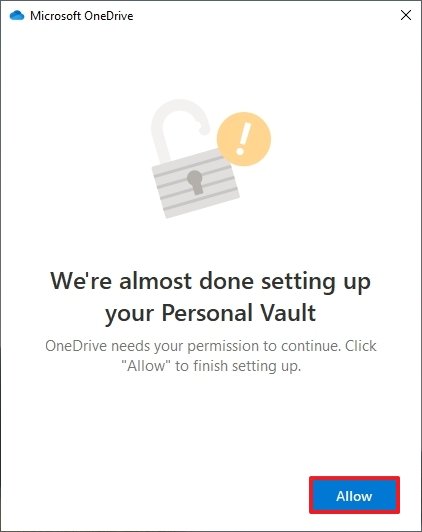
 -
Click the Allow push.
 Source: Windows Central
 - Ostend your Microsoft account password.
- Click the Sign in button.
- Continue with the on-screen directions (if applicable).


Once you complete these steps, you can outset uploading and downloading to the secure area of OneDrive.
If the pick isn't available, check the Personal Vault setting folio on your OneDrive account, and make sure to enable the characteristic.
Shop unlimited files to Personal Vault
To upload and protect unlimited files with the gratuitous tier of OneDrive Personal Vault, use these steps:
- Open File Explorer.
- Scan to the folder with the file you want to protect.
-
Click the New items bill of fare from the "Home" tab and select the Compressed (zipped) Folder option.
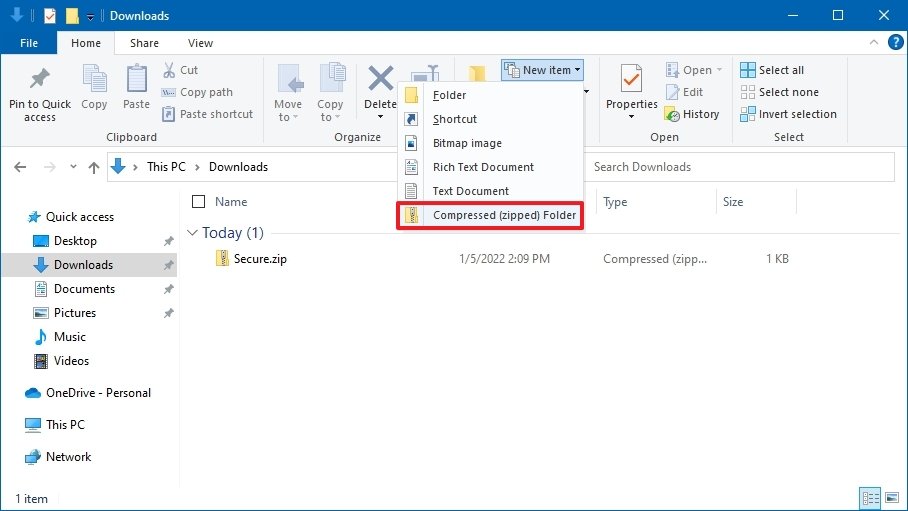 Source: Windows Central
 - Ostend a proper noun for the zip folder and press Enter.
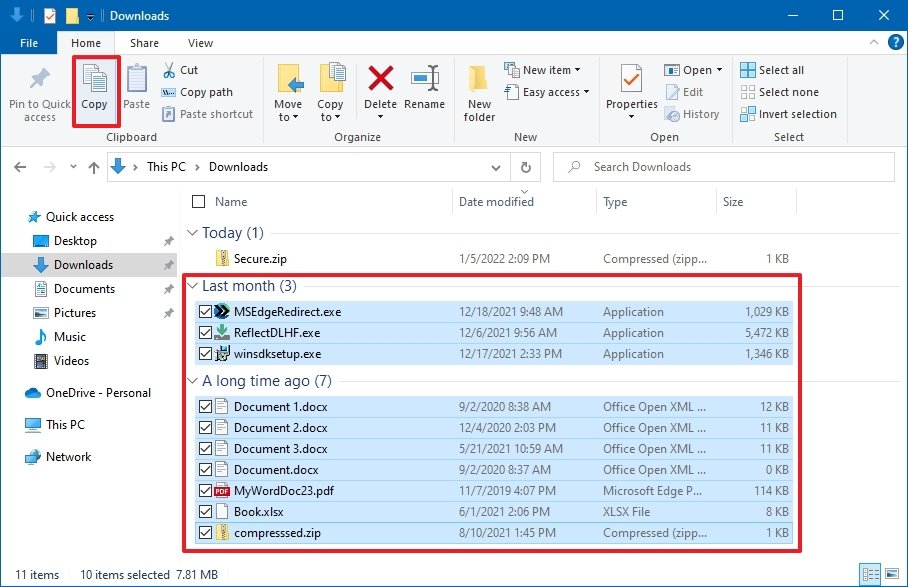
- Select the files to upload to the Personal Vault of OneDrive.
-
Click the Copy button from the "Home" tab.
 Source: Windows Central
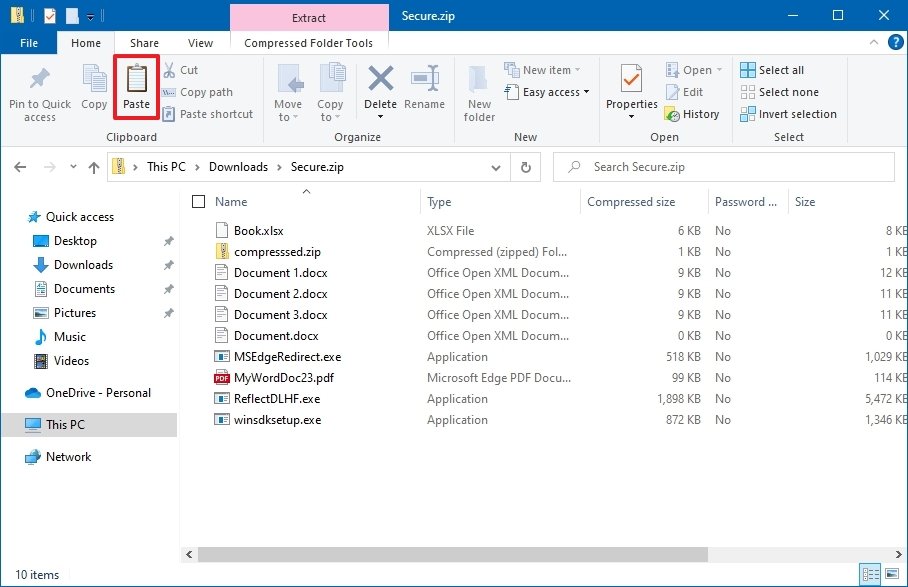
 - Double-click to open up the newly created zip folder.
-
Click the Paste push from the "Home" tab.
 Source: Windows Key
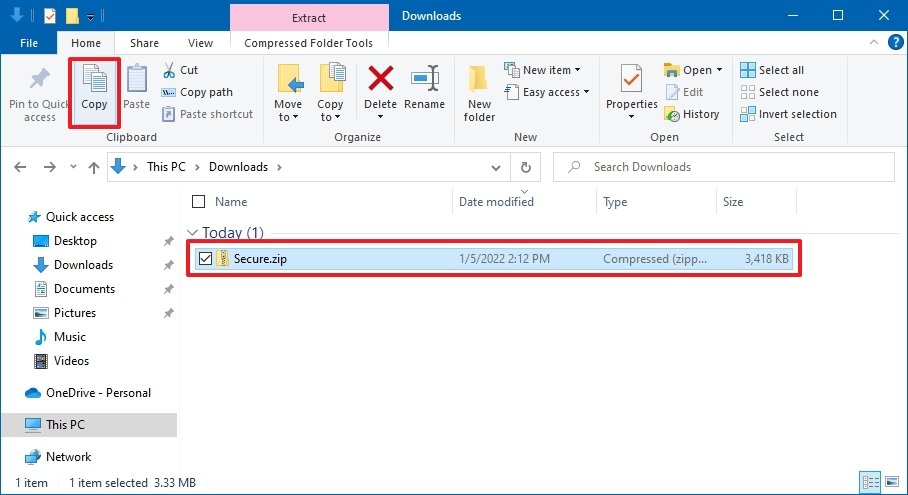
 - Click the Back button (Alt + left arrow keyboard shortcut) to render to your document'due south folder.
- Select the zip folder with the confidential files.
-
Click the Copy button from the "Home" tab.
 Source: Windows Central
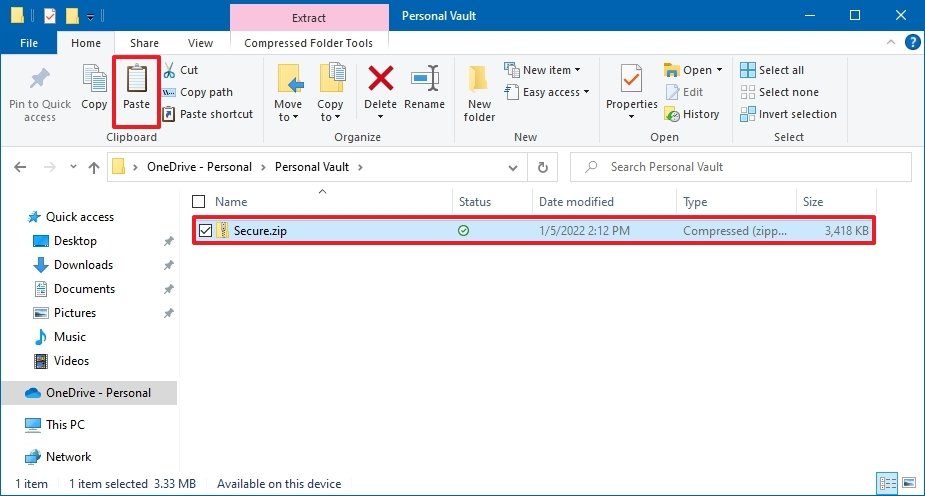
 - Click on OneDrive from the left pane.
- Double-click the Personal Vault shortcut.
- Confirm the account credentials (if applicable).
-
Click the Paste button from the "Habitation" tab.
 Source: Windows Key


After you complete these steps, the null folder with unlimited files will upload to your free version of the OneDrive Personal Vault.
Download files from Personal Vault
To retrieve your files from the Personal Vault, utilise these steps:
- Open File Explorer.
- Click on OneDrive from the left pane.
- Double-click the Personal Vault shortcut.
- Confirm the business relationship credentials (if applicable).
-
Double-click to open the zip container to access your files.
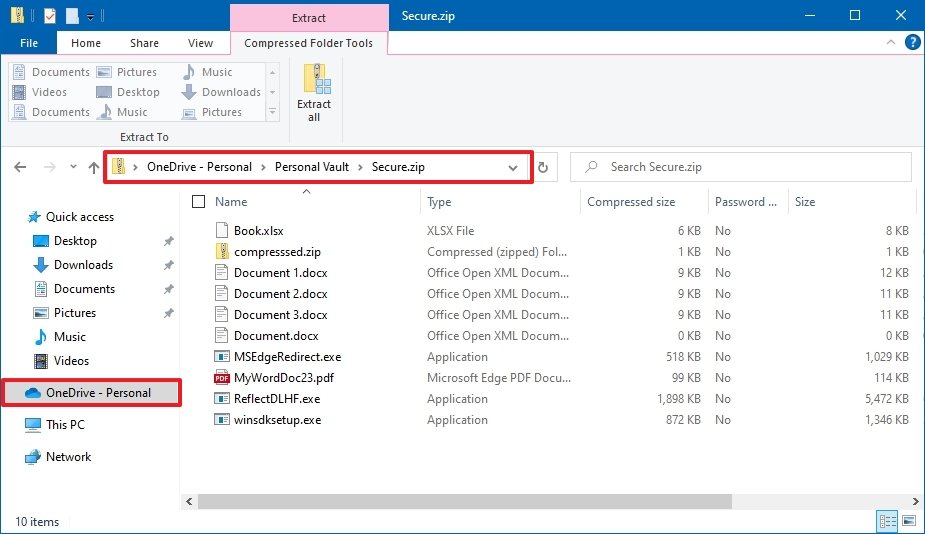 Source: Windows Central
 - Correct-click the document and select the Open up option.

Once you lot consummate the steps, you'll exist able to view the contents of the confidential document.
If you need to modify the certificate, the procedure is a piddling tricky. Start, select the file, cull a destination binder from the Compressed Folder Tools tab to extract, and then edit the certificate from the extraction location. After editing the file, right-click the original file from the zip binder and select the Delete option. Finally, re-create the newly revised document and paste it inside the zip binder.
More Windows resources
For more than helpful articles, coverage, and answers to common questions about Windows 10 and Windows xi, visit the following resources:
- Windows 11 on Windows Central — All you demand to know
- Windows 11 help, tips, and tricks
- Windows 10 on Windows Central — All y'all need to know
Nosotros may earn a committee for purchases using our links. Acquire more than.

Updated February 2022
Windows 11 review: The starting time of a new era
It'due south been six long years since the last mainline version of Windows shipped, and a lot has inverse in the Bone space since then. Microsoft is back with a roaring passion to create a modern version of the Windows user experience that's simple to use, beautifully designed, and well-connected, all in an endeavor to make you more productive in your professional or creative workflows. But, is it...

Shooty bang bang
Where are all the guns in Dying Light two?
It's by design, sure, but there's a distinct lack of firearms in Dying Calorie-free 2. For better or worse, modernistic medieval Villedor is a place to build your ain weapons. But what happened to the guns and ammo and might it ever make a comeback?

Source: https://www.windowscentral.com/how-store-unlimited-files-using-personal-vault-free-onedrive
Posted by: garlandfrome1953.blogspot.com
0 Response to "How to store unlimited files using Personal Vault (free) in OneDrive"
Post a Comment